3D Box Calendar | Denise Clark | Silhouette UK Blog
3D Box Calendar
Hello all you lovelies! Denise here today!
Now the festive season is out of the way it’s time to think above the year ahead!
Let’s start the new year off right with a lovely 3D Calendar constructed from Cardstock!
Materials Used
12″ Cardstock
A4 Cardstock
Double-Sided Tape
Wet Glue


Open Your File
Open up your software and once loaded go to your library top right hand side and look for the file we are using today.
You will see everything is grouped, so the first thing we need to do is ungroup it as you can see with photo right click on your file and look for ungroup which is highlighted in photo then place the parts around your workspace and cut the pieces in the required coloured card.
Cutting Your File
Once you’ve loaded required card stock onto cutting mat and loaded into the machine. Go to your send tab which is on top right hand side.
Under tool one has your options to cut I was using plain card so look for cardstock plain that’s your material, action to cut tool is well I’m using the rachet blade so I clicked on it to highlight that up.
I didn’t have to change anything else as it was all set for me. Now cut all your parts in your chosen coloured cardstock till everything is cut.


Assembling Your File
I have taken a photo to show you all parts of file.
I started with the long cubes.
Fold along the score marks and added adhesive to the flap side which you can see by photo now to assemble it.
Do it to all 3 of them as that’s your months cubes. The months you have cut add them to your cubes.
I did them the way the months fell in place. Now for your main boxes.
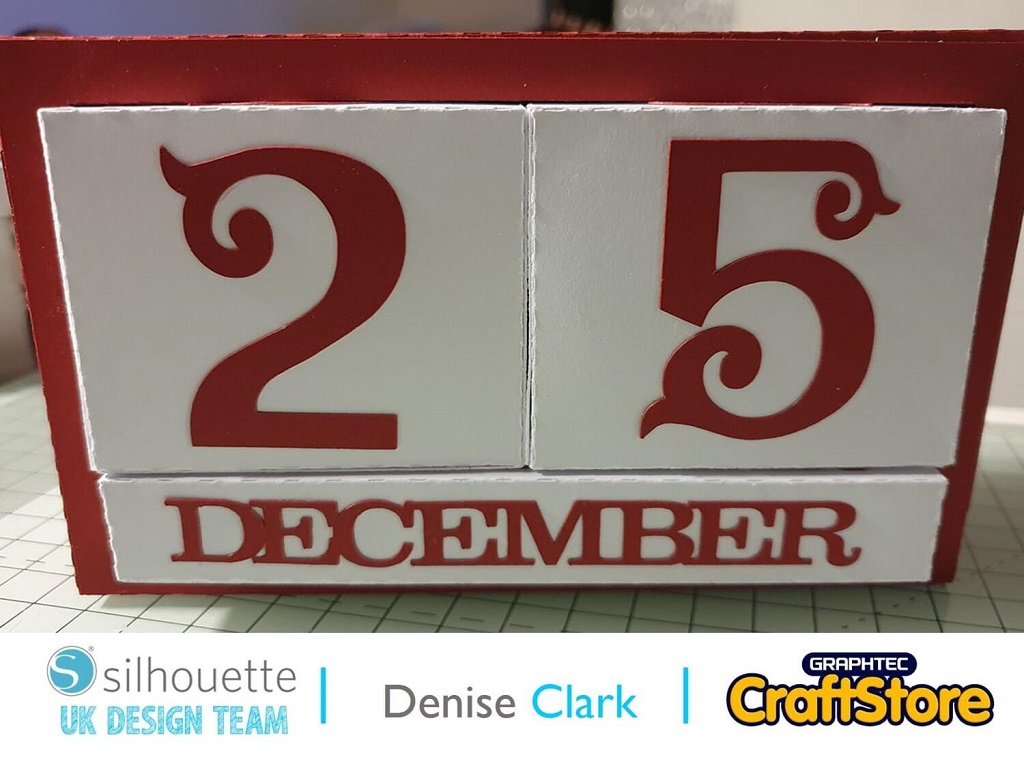
Fold all tabs inwards and add adhesive on the tabs and assemble them and finish these of by adding the numbers one block I added numbers 0,1,2,3,4,5 and the other block 0,1,2,7,8 & 9.
Number 9 is also used as number 6.
Assembling The Base Block
I got the 2 short ends of the base first and glued them together this time I used wet glue for these parts.
Once glued these parts together fold all tabs the same way, I folded them inwards.
The glued tabs should face out so the inside is all nice looking, no joins or anything.
Now the rectangle you cut out like a frame that’s your front part. add that to one side of your rectangle box frame by using wet adhesive See photo.
Now for the outside part take the long parts you have left glue these together and fold all tabs.
As you can see from photo I added adhesive to the bottom like the photo is showing.
Lay your front part of the box facing down and adhesive it.
You want to put wet glue if preferred to both tabs doing one part at a time.
Adhere the tabs shown in the photo and make sure all tabs are glued down and tuck the last tab in.
Now for the last part add adhesive around the tabs (back of 3d box) then put the last part that is left the rectangle on the part you have just added adhesive.
Turn it over and press making sure it all stuck down now that is you 3d box now ready to add your cubes and boxes.


Completing The Calendar
Have your 3x box standing up so you see into it.
Add your 3 cubes Don’t worry if they hang over a bit your cubes sort that part out.
Once you’ve added the 3 of them now add your cubes they keep your cubes in place and it doesn’t fall out at all.
I enjoyed making this 3d box Calendar.
It was so easy to do and yes kids can help too not a problem.
I used DST and wet glue to assemble this.
You can use any colours you like, I did it in the colours of our Christmas decorations seeing as they were still up when I put this together.
I hope you all had an enjoyable Festive season, see you again soon!
– Denise Clark –
Silhouette UK Blog Created By Denise Clark

Silhouette Products Used
Silhouette Designs Used
• Design Used: 3D Box Calendar
Design Store Artist: Lori Whitlock
Design Store ID: 27977 > Download
Share On Social Media
