3D Firecracker | Denise Clark | Silhouette UK Blog

Halloween Tissue Box
Hi It’s Denise here.
My blog today is about making a 3D Firecracker.
This the best time of the year for me, started getting ready for Halloween and started Christmas shopping and making decorations.
Anyway, let’s get back to our project and get started
Materials Used
• Silhouette’s A4 cardstock
• Glue
• Liner tape

Preparing your file
Once you have opened your software, go to top right hand corner and click on library and look for the file and click for it to open on your design space.
You will see once your file is showing it’s grouped.
So firstly, we need to ungroup it which if you click on it to bring a box around it then right click and scroll for ungrouping click on it and then click anywhere on you design area to release parts of the file.
Click and drag the parts off the design space.
Cut your parts of the file in your chosen colours.
Cutting Your File
To cut your file, lets pop on over to the top right hand corner where you can see the send tab click on it and this is the part that does your cutting.
The media I’m using is plain card, so I click the arrow down and a dropdown menu appears.
Now look for your required card. Everything else is automatically done for you so you just need to add your media to your cutting mat and load it into the cameo and press send.
It cuts away no problem for you .
Cut all your parts out first.


Assembling your project
I started off putting the base of the firecracker together by folding the tabs over and add red liner tape to the long tab down the side, then I adhere it together.
Next you want to grab one of your circles same colour as the base and I used wet glue for this part.
I put the wet glue on the inside of the tabs on the inside of the base and lay down the circle on top of the tabs and pressed down.
I then turned the base upside down and wet glue on the circle and press down, that’s your base done now do the same with the top of the fire cracker but this time you got a little square cut out on one of the circles.
The fuse the black thin cut strip put that through the square and you will see 4 small tabs fold them like in the photo and adhere them to the circle by using wet glue.
This part goes on the top of your lid once you have assembled the lid the same way as the base.
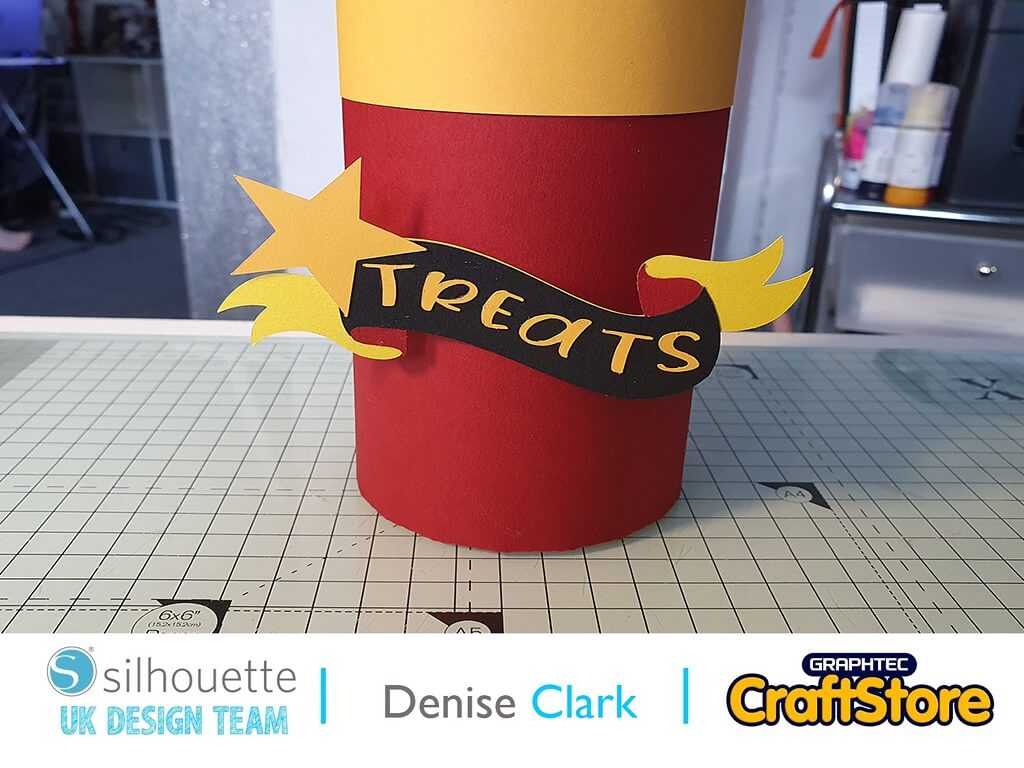
Adding the banner
Assemble your banner together by using wet glue this gives you time to move it about, if need be.
I finished it off with cutting out the word treats in the required colour and adhered them by using wet glue.
Now your project is finished, and you can fill it with little treats.

Wow this was so easy to make, it really cut out well.
You could also use this for Christmas and decorate it for that season.
Anyone could join in making these and decorate them to their requirements.
Great to fill up and hand them out to school teachers and so on.
– Denise Clark –
Silhouette UK Blog Created By Denise Clark

Silhouette Products Used
Silhouette Designs Used
• Design Used: 3D firecracker
Design Store Artist: Lori Whitlock
Design Store ID:139535> Download
Share On Social Media


