Christmas Advent Countdown | Natalie Ballard | CraftStore Direct Blog

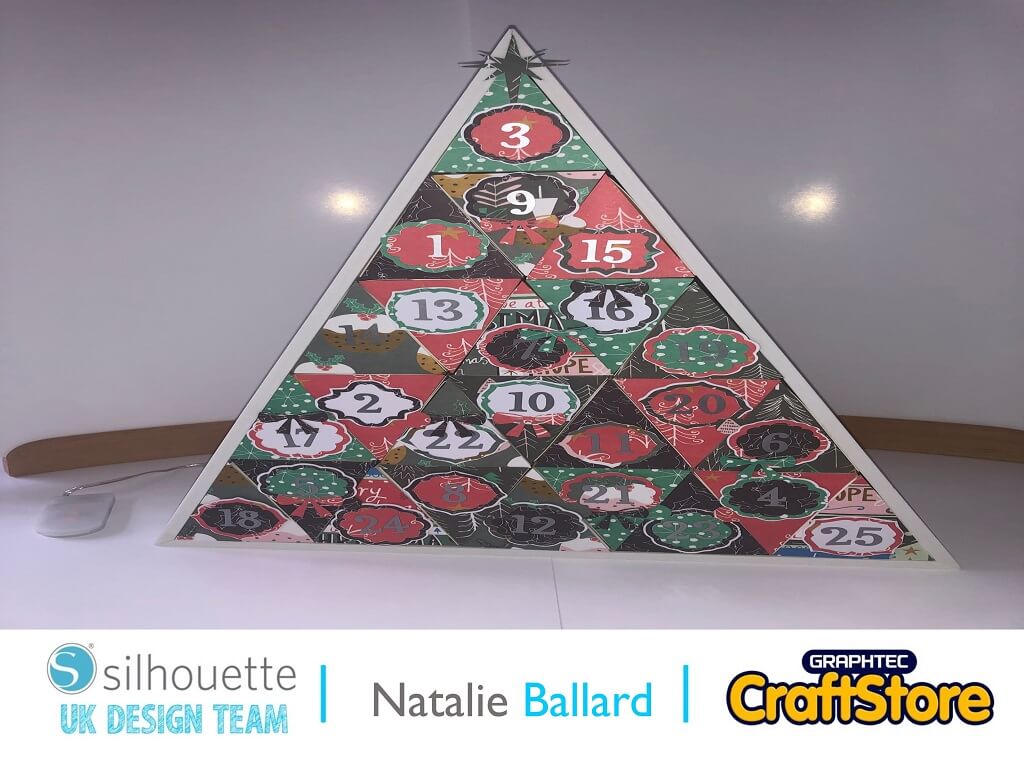
Christmas countdown advent calendar
Hello! Natalie here today with a fun project.
I was thrilled to have a go at this challenging project.
So, gather your Christmas papers and some twinkling lights (LED and battery powered of course) and let’s dive in.

Opening the packet
Inside the Countdown set you get the main advent frame and 25 pre-made boxes along with an activation card.
Carefully unpack these and stack the boxes to one side for later.
Activate the card on the Silhouette website to access 4 pre-made scenes for the back panel, a box cutting file (should you wish to make your own or future replacements) and all the decorative elements for the front.
Choose a scene
When you bring in the scene of your choosing, it will be grouped and larger than the mat.
Do not resize the designs, but instead use Ungroup to separate the elements.
Group the individual pieces and then place the first two panels onto your mat for cutting.
Cut each of your pairs from a high-quality cardstock: I used Iced White Shimmer Card for mine so my project has a subtle sparkle when lit.


Assembling the back panels
Score and fold the outer edges of your panels.
You want to work from the front of your design backwards as we will be inserting the pieces from the back of the frame.
Insert your first two pieces or build it one section at a time, whichever you feel is easier.
As you put in each piece, you want to use a hot glue gun to glue your light string in place.
I cut and extra back panel for both top and bottom sections to hide the battery pack and the wires. This is entirely optional and down to personal preference.
Cutting the front panels
Using the Advent Calendar Box Faces file, cut 25 triangles for your chosen decorative paper(s).
I used 3 different double-sided papers so my project has lots of variety, but you could keep it simple and use all the same pattern.
You need 10 downwards triangles and 15 upwards triangles and this is important if your papers are directional designs.
These triangle fit edge to edge on the included boxes.
You could use an inwards offset if you want your boxes to have a white border.
I cut some of mine with pull tabs, but later numbers won’t need these.


Adding the decorations
I used a mix of patterned paper and white card to cut the backgrounds for the numbers along with some of the included embellishments that I felt complimented my design.
The numbers themselves I used a sheet of silver metallic vinyl from the Graphtec Vinyl pack. You can then use transfer paper to add these numbers directly onto your panels.
Finally, adhere these panels to your boxes, being mindful of order, edges and tabs so no box gets locked in.
I really enjoyed this project, and I’m considering making more of them for family and friends to enjoy.
I also want to try adding a musical element to them as this is such a sturdy project to be enjoyed for many years to come.
– Natalie Ballard –
CraftStore Direct Blog Created By Natalie Ballard
Products Used
Share On Social Media
