Christmas Stocking Filler | Denise Clark | Silhouette UK Blog
Santa Head Pillow Box
Hello all you lovelies!
I hope you’re all getting excited for the run up to Christmas.
Today’s Blog is about Stocking fillers, a Santa head pillow box to be exact.
These are great for anyone in their Santa sacks or more traditional way the Christmas Stocking!
Materials Used
Silhouette Adhesive-Backed Cardstock
Double-Sided Tape


Open Your File
Open your Silhouette studio, go along top righthand corner and click on library.
Choose your file click on it to open it on your design space.
Click on the size as it’s showing as automatic (cameo) you wanting to set it for A4 shown in the picture then change the orientation to landscape look for orientation and click on the box that’s highlighted in photo it’s the landscape orientation your wanting.
Ungrouping Your File
You can now ungroup your file by left clicking on it and to make sure it’s all highlighted and then right click and click on ungroup as shown in the photo.
Then you can separate the file as you can see in the photo.


Cutting Your File
You are going to need to go to send screen on the top righthand corner. As you can see in picture.
I’m cutting the main box first. Under Tool one is your options for cutting beside where it says Material you wanting to click on it and look for cardstock, adhesive-backed, action to cut and tool ratchet blade if your using one if not click on tool and it will give you other options.
Once I clicked on the cardstock the blade, speed, force and passes were done automatically with the setting so I didn’t touch a thing.
Once you got your cardstock in place on your cutting mat load it into your cameo now press send at the bottom right of your screen.
Do the same with the other parts of your file by cutting them in the selected colour cardstock and cut till all is done.
Assembling Your File
As you can see from the picture all the file is cut and ready to assemble.
I folded the score marks and added adhesive to the side panel which is the smallest panel on it.
Fold your pillow box and stick it together.
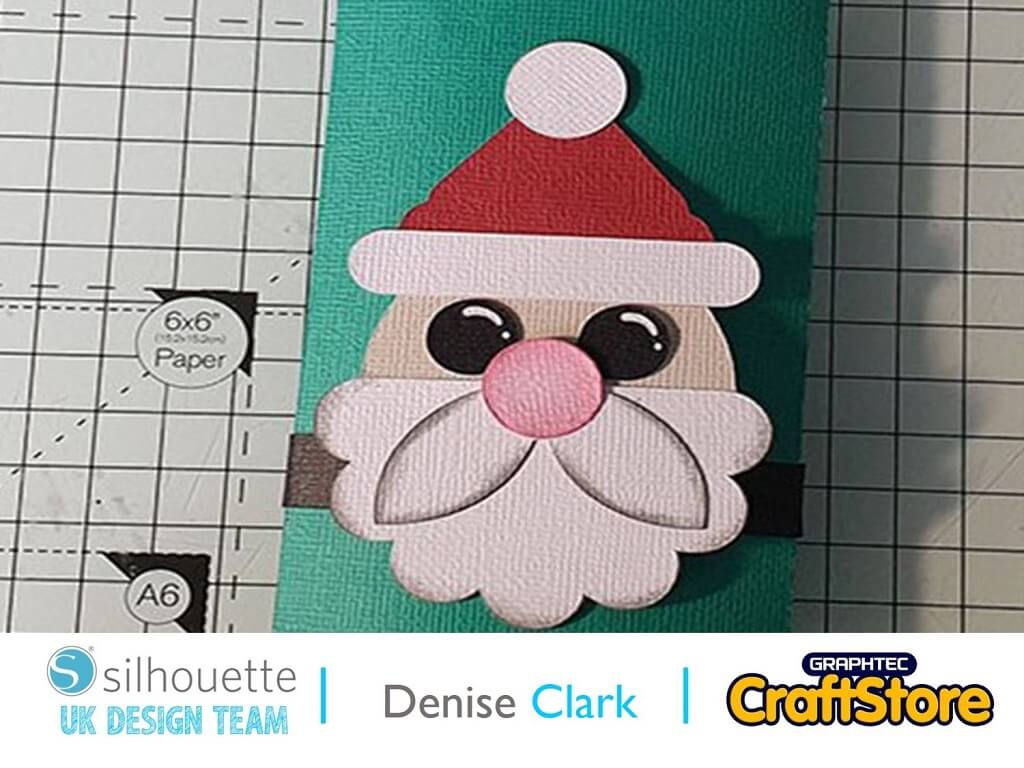
Now for the Santa head.
Peel off the backing paper and stick it on bit by bit to make the Santa head.
I added adhesive on the back of the Santa just down the middle and adhere onto the pillow box.


This project is easy to do and if you wanted to make a few for stockings this is a great way to get the children involved.
It is enjoyable to make with or without kids.
Get the Christmas music on and make these they are really relaxing to do.
This design you can use repeatedly for years to come!
– Denise Clark –
Silhouette UK Blog Created By Denise Clark

Silhouette Products Used
Silhouette Designs Used
• Design Used: Santa Head Pillow Box
Design Store Artist: Snapdragon Snippets
Design Store ID: 272133 > Download
Share On Social Media


