Hello Kindergarten | Natalie Ballard | Silhouette UK Blog
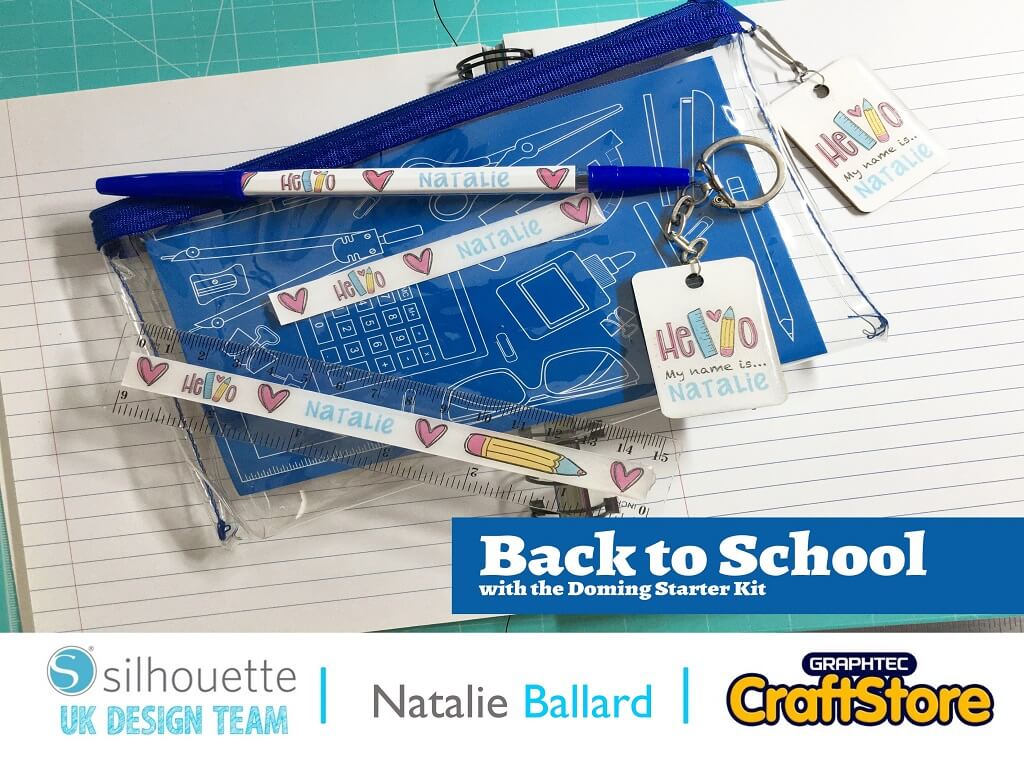
Hello Kindergarten – Doming Project
Hello! Natalie here today.
Many of the Doming Kits on the market need an inkjet printer, so for this tutorial I wanted to show you how you can use a laser printer instead.
Just use the Doming kit as directed if you have an inkjet.

Downloading The File
Purchase and download the Hello Kindergarten file (379478) from the Silhouette Design Store.
Add it to a mat and ungroup it.
Splitting The Design
Move over the Kindergarten text to one side for design reference.
Group the “Hello” elements together.


Add Your Text
Use your text tool to add “my name is…” and the child’s name.
With the name, use a mix of uppercase and lowercase letters.
Styling Your Text
Match the font style to suit the fonts you currently have installed.
Style the font size of the name so all letters are equal in height.


Fitting Your Objects
Add the cut lines for the objects you want to add stickers to.
Consider if you want your sticker to cover an object in its entirety, or just a section of.
Colour the outline red ready for cutting.
Adjusting The Layout
You can reuse elements of the design to fit other proportions.
Use ungroup, align and distribute to fit the new shape.


Printing The Design
Make sure your original design has had the outlines removed so you don’t have more cut lines than you need.
Turn on registration marks and print out your design onto laser printable vinyl.
Cutting The Stickers
Place your printed sheet onto your cutting mat.
Send the design from Silhouette Studio.


Preparing The Resin
Remove the waste from your sticker sheet and any elements that need weeding out (the centre of holes etc.).
If the sticker will be applied to a curved surface, apply it to the object; if not, leave it on the backing sheet.
Applying The Resin
Fill the syringe from the top equally. Swap from the pink stopper to the syringe tip.
Turning the syringe tip upwards, squeeze the syringe to remove the air pockets.
Wrap the tip in tissue to avoid squirting or splashing.
Squeeze the syringe onto a piece of the palette paper.
Draw the resin around the edge of the sticker but staying within the lines.
Keep squeezing the syringe consistently.
Move inwards to fill the sticker.
Use the included cocktail stick to move the resin to the absolute edges.


Curing & Applying
Allow your stickers to cure for at least 12 hours.
Once cured, you can apply to your keyring blanks, pencil case, rulers and/or pens.
You can use jumprings to attach your keyring blanks to your stationery and other objects.

I can honestly say I’m now hooked on resin.
The process was far easier than I had anticipated and there was little smell.
I look forward to showing you more resin based projects in the future.
– Natalie Ballard –
Silhouette UK Blog Created By Natalie Ballard
Silhouette Products Used
Silhouette Designs Used
• Design Used: Hello Kindergarten
Design Store Artist: Chameleon Cuttables
Design Store ID: 379478 > Download
Share On Social Media


