Mother’s Day Frame | Cherylann McCool | Silhouette UK Blog
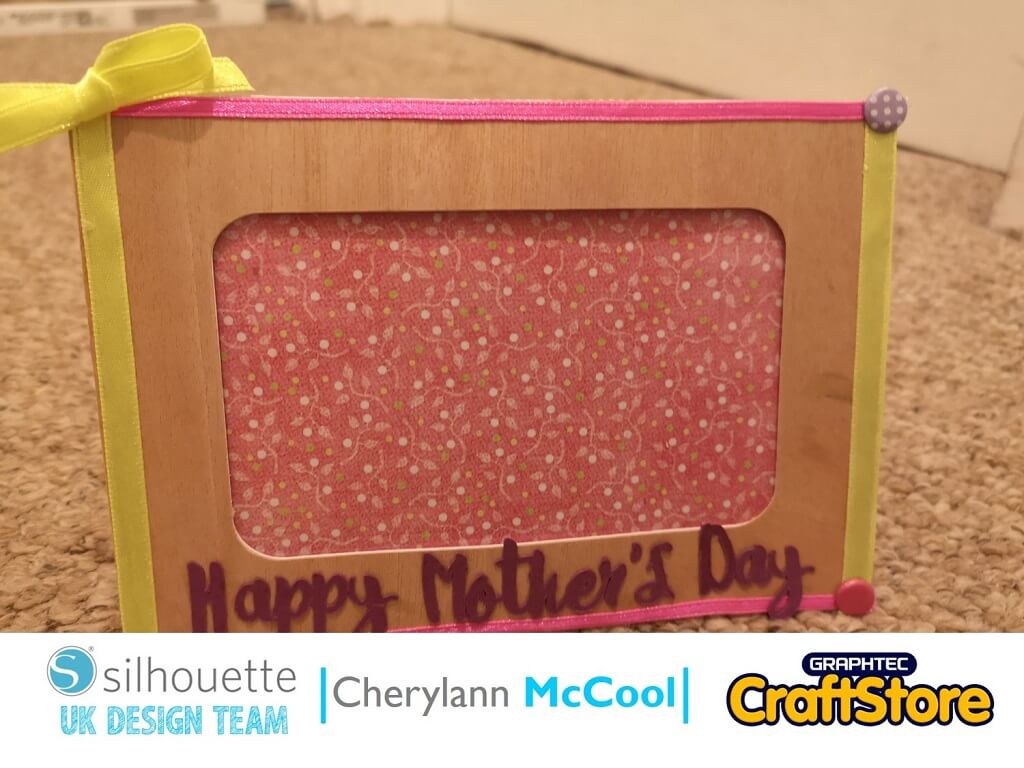
Mother’s Day Frame | Silhouette Wood Paper Sheets
Hi Cheryl here again.
It’s that time of year that we thank that Special Mum in our lives and like to spoil them then I think this project will suit you well.
Craft Materials Used
• Silhouette Wood Paper Sheets
• Cardstock or Paper
• Acetate
• Ribbon
• Gems or Candy
• Glue or DST
Open Your File
In your, software open your files in the design space that you have downloaded from the Sdilhouette Design Store.
Place your card onto your mat and load into machine.
On your page setup panel change your media size to Letter.
You will want your frame to fit most of the page of the Letter. To do this you need to right click to get box around file, now you want to move so the main part is on the page alone and increase the size by pulling any of the small boxes until you are happy with your size.
Cutting Your Cardstock
Once you are happy that your media is set to plain cardstock hit the send button to start cutting.
Once cut, remove the main frame and repeat cutting for the other piece without changing the size.
Once this piece is cut, put the pieces of card to the side and bring back the main frame file.
Editing The Size
If you drag the frame to show either just the front of the frame and later the back and move it down the page so that the dotted line is at the very edge and now on your page setup change your media size to 5″ x 7″ and make sure the mat is facing the same way as your file and if happy then hit Send.
Change Your Material Settings
You should now change your material to Wood Paper and if happy then hit send to Cut.
Once this part has been done repeat for the other side of the frame.
Building The Frame
Once your wood paper has been cut then it’s time to make up your frame.
First of all you should layout the card frame and peel the backing off the wood paper and attach to the two parts of the frame making sure that the tabs to hold the frame up aren’t sticking.
Then you want to glue the edge of the back side to the inside of the front and hold in place til it sets.
Change Your Material Settings
Now for the single piece of card.
I would decorate it with a patterned paper and you can now decorate the front.
If you want to put the wording on the front then you should repeat steps 1-2 and once cut you can glue onto the front and you have a gift made for your mum.
Happy Mother's Day
I had great fun making this frame especially as I was using Wood Paper and WOW I just love it, who would have thought that you can cut cut wood paper.
This frame is also ideal for anyone who travels a lot it means you can keep a picture of your loved one with you.
If you liked this project then you should come and check my blog to see what I will be making next.
– Cherylann McCool xx –
Silhouette UK Blog Created By Cherylann McCool
Silhouette Products Used
Silhouette Designs Used
• Design Used: 3D Standing Frame – Rectangle
Design Store Artist: Alaa’K
Design ID: 20636 > Download
• Design Used: Mother’s Day Butterfly Card
Design Store Artist: Sweet Afton
Design ID: 132122 > Download
