Stamping With Glyphs | Verity Biddlecombe | Silhouette UK Blog
Stamping With Gyphs | Silhouette Mint
Hi everyone, Verity here today from PrettyLittleButton.
The Mint machine is great for creating your custom stamps and there are a whole hosts of glyphs you can use to create fun stamps.
Combined with multi-colour stamping you can create fun repeating backgrounds for your papercrafts.
Using The Software
Open up the Silhouette Mint software. Select the stamp settings window along the top right tool bar.
Here you can chose the size of the stamp sheet your want to design with. Select the size of stamp sheet you will use and the stamp area will change to the right size.
For this stamp, we are using the 45X45 stamp sheet.
Use Silhouette Studio
The glyph font ‘Springaling’ would not load in the Silhouette Mint software, however we can still use it when we combine your Silhouette Studio software with the Mint machine.
Load up the Silhouette Studio Software and select the glyphs from the font you wish to use. Make sure you fill the glyphs in with a color so we have a solid image.
Transform
Next, position the glyphs in a pattern you are happy with.
You can use the align tool in the Transform window to align the glyphs vertically so they are nice and straight.
Convert To Compound Path
Once you are happy with the design, the glyphs which are still currently a font need to be turned into a compound path. First of all make sure all the glyphs are grouped at the same time and right click to select ‘make compound path’ from the drop down menu.
This has converted them from a font to a compound path and you can no longer alter the design as a font. If we tried to export this design prior to making a compound path we would not be able to load the design into the Mint Software.
Export The Design
With the design selected, we need to export the design.
From the ‘File’ drop down menu, select ‘Save selection’ and then ‘Save to hardrive’.
Save the design in a folder you can find easily when in the Mint software.
Loading Into Stamp Area
Now go back to the Mint software and open the design from ‘File’ and open. This will load the glyph compound path design into your stamp area. Resize to fit the stamp and until you are happy.
Here the card is A5 in size and the heart was mounted onto color corresponding matting layers.
Send To Mint
When you are ready to ‘Mint’ your stamp, select the ‘Send to Mint’ option along the top right-hand toolbar. Make sure you have connected your Mint machine to the computer and had switched it on. It should tell you if you Mint is ‘ready in the lower bottom right of the screen.
Next, make sure you have the correct stamp sheet ready; it tells you the size next to the Mint machine picture.
Now press the ‘Start Mint’ option and then insert the stamp sheet into your Mint machine from the back.
Once the stamped is ‘Minted’ , break the seal of the stamp along the dotted line and peel the stamp sheet off the cardboard backing and adhere onto a stamp block.
Stamp Away
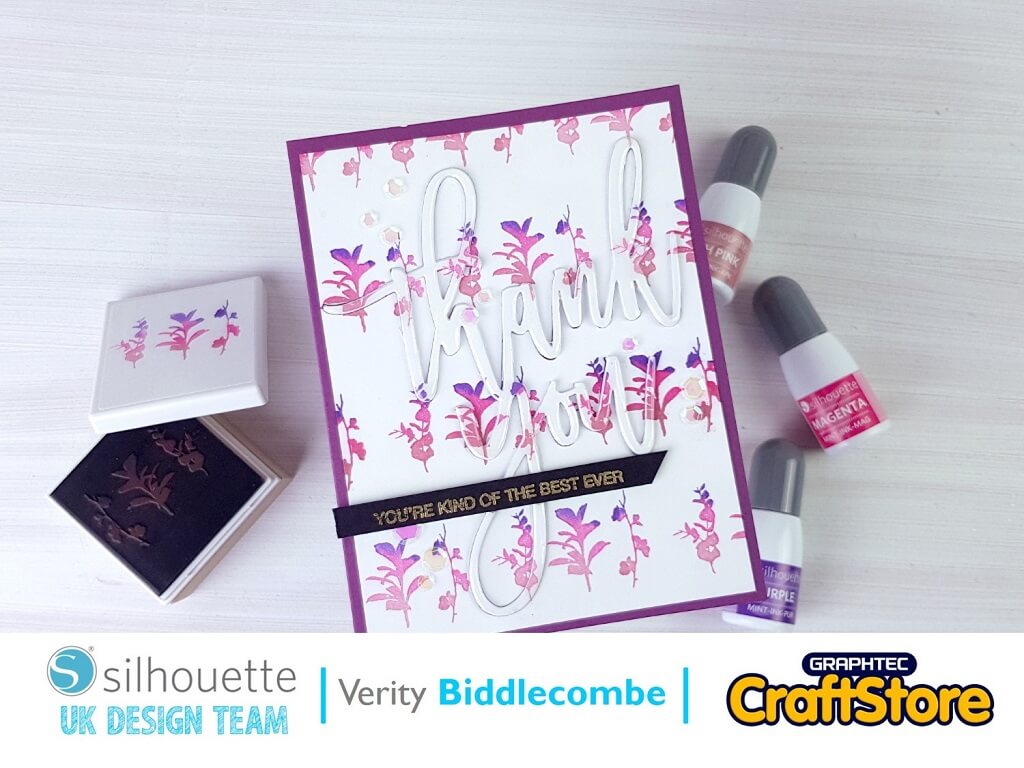
Select the colour of inks of your choosing and apply the ink over the stamped design. Allow the ink to soak in for 10-15 minutes before stamping off any excess ink.
When the stamp is ready to use, repeatedly stamp the image across a piece of white cardstock. Next, take a die of your choosing and cut this from the background along with 2-3 more out of white card to layer up to create a eclipse card.
To do this, adhere the background to a card base and insert the layered die-cut back into the background. Make sure you also adhere all the inners of the letter back down onto the card without any additional dimension. Finish the card off with a heat embossed sentiment and add selection of sequins of different sizes. For a little more shine, add some clear gloss such as glossy accents over the top.
Stamping Made Easy
– Verity Biddlecombe –
Silhouette UK Blog Created By Verity Biddlecombe
Silhouette Products Used
Silhouette Designs Used
• Design Used: Spring A Ling Floral Dingbat Font
Design Store Artist: Angie Makes
Design Store ID: 291332 > Download
Share On Social Media

