Summer Boat Birthday Card | Verity Biddlecombe | Silhouette UK Blog

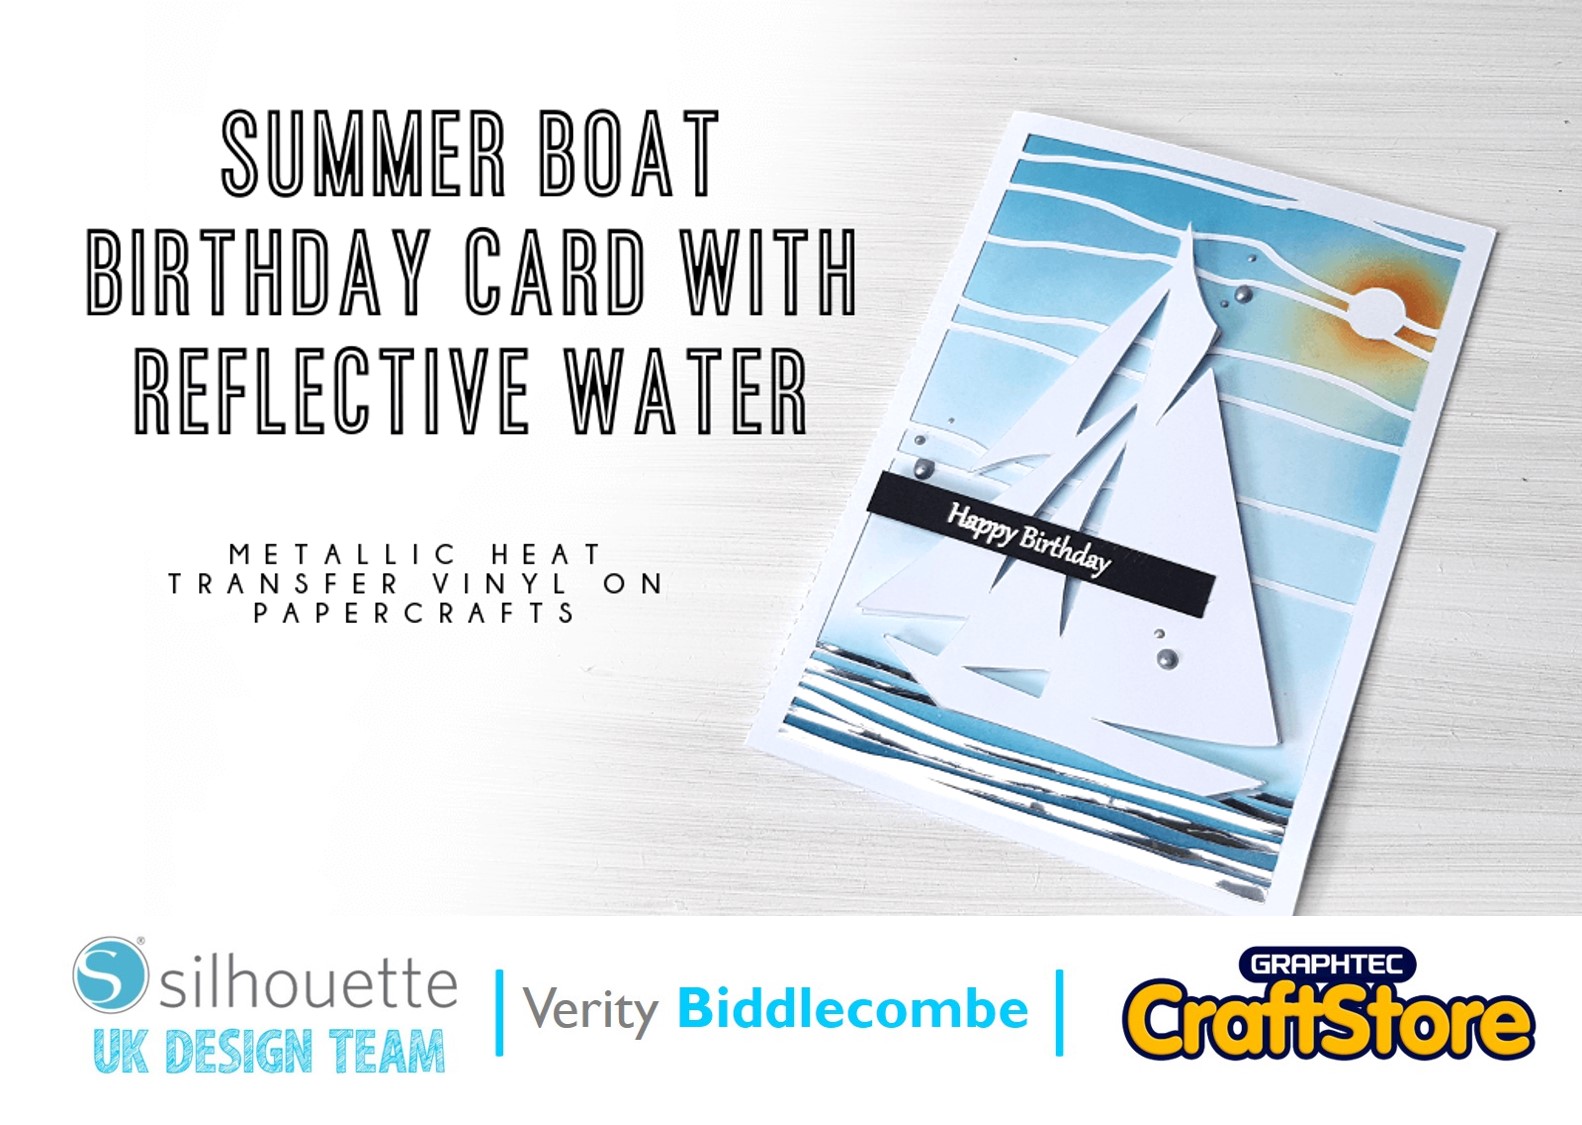
Summer Boat Birthday Card | Metallic Heat Transfer Material
We all know heat transfer vinyl is great for creating custom clothes and soft furnishing. However, it is also a great way to add foil elements to your papercrafts and it is much easier than regular metallic adhesive vinyl.
Simply place over your project with its no adhesive backing making it easy to align, apply parchment paper over the top to protect the paper and then press for 10-15 seconds with your heat press or iron.
No mess, no glue and stunning results in the form of my Summer Boat Birthday Card!
Creating The Summer Boat Birthday Card Design
Open up the Yacht Papercut Card by Nic Squirrell into your design space. Ungroup the elements so you separate the boat design from the card outline. Duplicate the design and put once design back into the card outline and group back together.
Draw an outline around the water elements at the bottom off the design – it is useful to change the line colour at this point so you can be sure the box covers all the areas you desire. Make sure the box is slightly larger than the design as it will make the next step easier.
(Make Sure You Scroll To The Right For Both Images)
Altering Your Design
Open the Modify panel and with the blue box and the design selected, press the crop option – remember the box needs to be wider then the design for the crop to work.
Once it has cropped all the water elements will sperate out, before clicking off make sure you right click and group these elements together. Draw another box around this, making sure the box line overlaps the water design lines, and select this along with the water design. In the modify panel, select ‘Make’ compound path. This step must be done before you weld the items together.
After this, select weld. You will now have a cut file for just the element of the design. This can be cut out of the metallic HTV but before you send this to cut you must reverse the design as you do with all items you cut out of HTV. To do this, right click and select flip horizontally.
(Make Sure You Scroll To The Right For Both Images)
Picking Out Part Of The Design
Having duplicated the design again, I wanted to cut out the boat to creating more dimension to the design. In order to just cut the boat out, we need to separate the boat from the rest of the design. To do this, we use ‘edit points’ .
Zoom in to an area of the boat to start separating the design; here we are starting at the top of the sail. Right click the design and select edit points. Chose one of the points at a point where the wavy horizontal lines cross the sails and right click on the point. Select ‘break point’. This will convert the point from a square to a red circle. That one point will have converted to two circles as the circles represent a break in the line, you can now mover these circles away from one another. Drag the circle down to the next part of the design where we will eventually connect it to.
When you have ‘detached’ the design way from the remainder of the shape, right click and select release compound path. This will truly separate the lines from one another, allowing you to delete any lines you no longer need.
(Make Sure You Scroll To The Right For Both Images)
Joining The Design Together
Once you have separated the lines away from the original design, you need to join the disjointed lines up together. To do this, you need to make sure all the lines are part of the same compound path. Select all the disjointed lines and right click ‘make compound path’.
No when you select edit point on the disjointed lines, you will have many unconnected red circles. Move a red circle to the nearest circle within in the design and they will automatically connect. Once all lines are connected, the boat design will have a continuous outline and be separate from all the lines.
(Make Sure You Scroll To The Right For Both Images)
Assembling The Summer Boat Birthday Card
Cut out the boat out of white card along with the original card base design as well.
For the water, cut this out of silver HTV, as mentioned previously ensure you have flipped the design before you do this.
With a white piece of card, smaller than 5”x&, ink blend a sky and water element lining up with the card design. If you wish you can also add some yellow colour in the location behind the sun on the card design. Adhere this inside the card bas using double sided tape and glue.
To add the HTV, weed the negative part of the design and position the waves over the card aligning with the card design. Cover with a piece of parchment scratch paper and press with a hot iron for 10-14 seconds. Peel off the clear backing and the HTV will have adhere to the card.
Foam mount the boat onto the front for added dimension. Add a small heat embossed sentiment and a few nuvo drops for embellishments.
(Make Sure You Scroll To The Right For Both Images)
The Summer Boat Birthday Card Is Complete
Silhouette UK Blog Created By Verity Biddlecombe
Silhouette Products Used
Silhouette Designs Used
• Yacht Papercut 7×5 Card By Nic Squirell (Design ID 78168): Download
Share On Social Media


